Body
The following steps will walk through how to change or add what folders sync with OneDrive.
Move/Choose Files for the sync folder:
1. Select the white or blue OneDrive cloud icon in the notification area, at the far right of the taskbar.

Note: You might need to click the Show hidden icons arrow  next to the notification area to see the OneDrive icon. If the icon doesn't appear in the notification area, OneDrive might not be running. Select Start, type OneDrive in the search box, and then select OneDrive in the search results.
2. Select  Help & Settings > Settings.

3. Select Pause syncing drop down > 2 hours

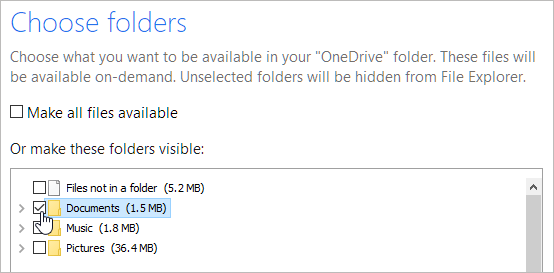
4. Select  Help & Settings > Settings. Select the Account tab, and select Choose folders.

5. In the Sync your OneDrive files to this PC dialog box, uncheck any folders you don't want to sync to your computer and select OK.

***You cannot add non-OneDrive folders (such as C: and D:)***
Notes:
-
If you uncheck a folder you are syncing to your computer, the folder will be removed from your computer. The folder and its contents will still be available online.
-
The sync settings you choose are unique to each computer unless you're syncing everything everywhere. Also, if you're choosing folders on two computers and you create a new folder on computer A that you want to sync to computer B, you'll need to go to computer B and select the new folder there.